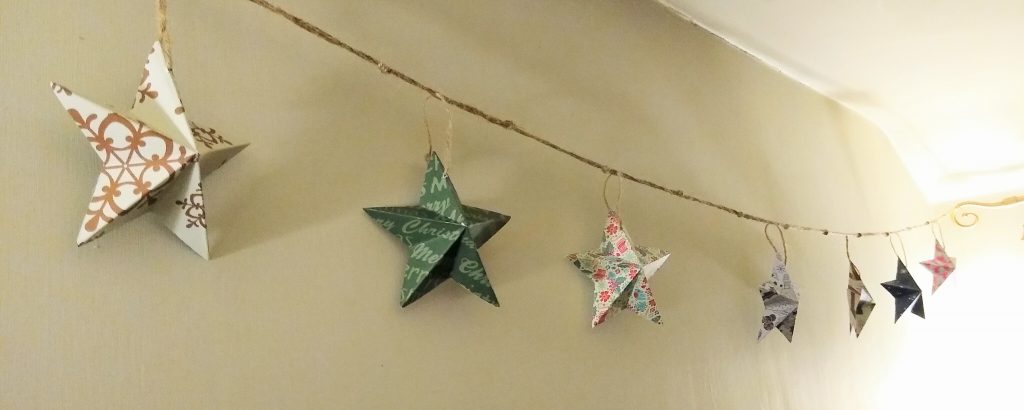
I love Christmas, season of peace, love and joy; a festival of light in the darkest part of the year. But I don’t love all the excess and waste that it can cause if we’re not mindful. And that’s why, instead of replacing my old gold plastic foil garlands with more of the same, last year I created some of my very own eco-friendly Christmas decorations, in the form of these gorgeous rustic D.I.Y. paper star garlands.
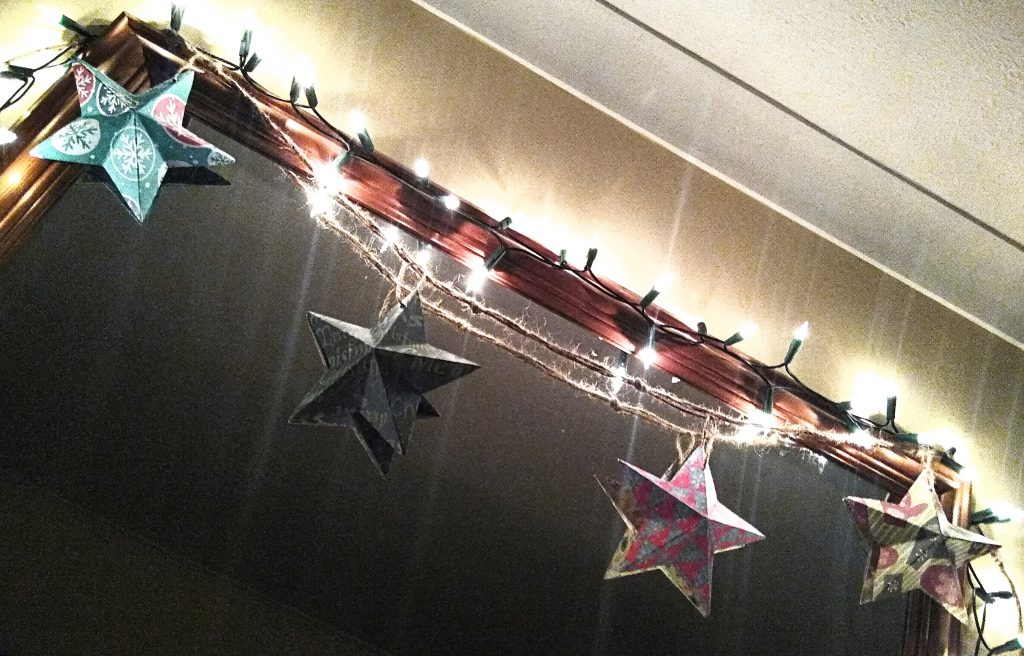
I love the festive, homemade look of them, and how they twist and turn and catch the light. Lots of guests have complimented my paper star garlands. I’ve had great responses having given them away as gifts too!
WHY MAKE D.I.Y. CHRISTMAS DECORATIONS?
Every Christmas in the UK we produce and discard 30% more rubbish than any other time of year. Meanwhile the US produces 25% more over the period from Thanksgiving to new year – that’s 1,000,000 extra tons per week.
The biggest contributor to this mountain of waste is the plastic packaging of toys and other gifts. But another significant part is the Christmas trees, worn out decorations and broken fairy lights.
A huge proportion of our Christmas decorations are plastic, and usually not the recyclable kind. They’re destined for landfill, and a portion inevitably enters the wider environment and breaks down into polluting microplastics too.
And when you consider the excess of poorly-made tat on shop shelves, the fact that modern products and materials are rarely built to last, the fashion for changing your decorations every season, and the tendency for our stores to ship in cheap products made all over the world, the environmental impact of our whole consumer culture around Christmas is enough to make your eyes water.
By making more mindful decisions about our Christmas desires and how to fulfil them, we can reduce the impact of Christmas in our own homes. Imagine the benefit if everybody did it!
MAKE YOUR CHRISTMAS DECORATIONS MORE ECO FRIENDLY
In fact, when it comes to decorating for the festive season, there are many ways you could reduce your impact:
1 – Buy high quality items and look after them carefully, so they last as many years as possible.
2 – Choose recyclable materials wherever you can. That means no foil parts and no glitter! This goes for Christmas cards and wrapping paper too.
3 – If you’re buying new lights, stock up on replacement bulbs right away. This way you’ll avoid not being able to find them in a few years time.
4 – Use a living Christmas tree and care for it in the garden between Christmases. Or rent a tree! If you have to choose an artificial tree, again, buy high quality and look after it!
5 – If you must have a different look to your decor each year, organise a swap with friends or neighbours. Or buy second-hand.
6 – Don’t get carried away! Make do with fewer, more carefully chosen decorations. Sometimes less is more!
7 – Make your own plastic-free eco-friendly Christmas decorations!
DRAWBACKS OF ECO-FRIENDLY CHRISTMAS DECORATIONS
Making your own Christmas decorations takes some extra time and planning, and has none of the convenience of simply strolling into a shop and picking out your favourite things.
Another drawback of eco-friendly decorations is just that they’re less shiny than modern plastic and foil decorations. At Christmas we like a bit of glitter and sparkle, and I guess we’re all used to having that. But metallic paints and glitter are inevitably made of plastic.
A hundred years ago, there wasn’t much glitter or sparkle except from candles. Only the mass production of plastic goods starting in the 1950s brought tinsel, glitter and fairy lights into our homes! Before that, Christmas decorations were much more rustic. Though there were some expensive baubles made out of metal or glass, in general Christmas decorations were heavy on natural items such as branches, pine cones and fruit.
Personally, I like the rustic look! My glitter and sparkle comes from good-quality fairy lights that will last for years, plus a few candles sometimes. Oh, and some old plastic tinsel and baubles still… They have plenty of life in them yet, but when they finally wear out I’m sure I’ll be comfortable replacing them with something ‘greener’!
ADVANTAGES OF ECO-FRIENDLY CHRISTMAS DECORATIONS
As well as the obvious environmental benefits of making eco-friendly Christmas decorations, it can easily be cheaper than buying decorations, depending on the materials you choose. Homemade decorations come without plastic packaging, and let you avoid some of the shopping crowds. They allow you to exercise your own creativity and design ideas. And you can even turn them into a family activity by getting everyone to help! Once you get the hang of it, the stars are easily made while you’re watching TV or chatting to friends.
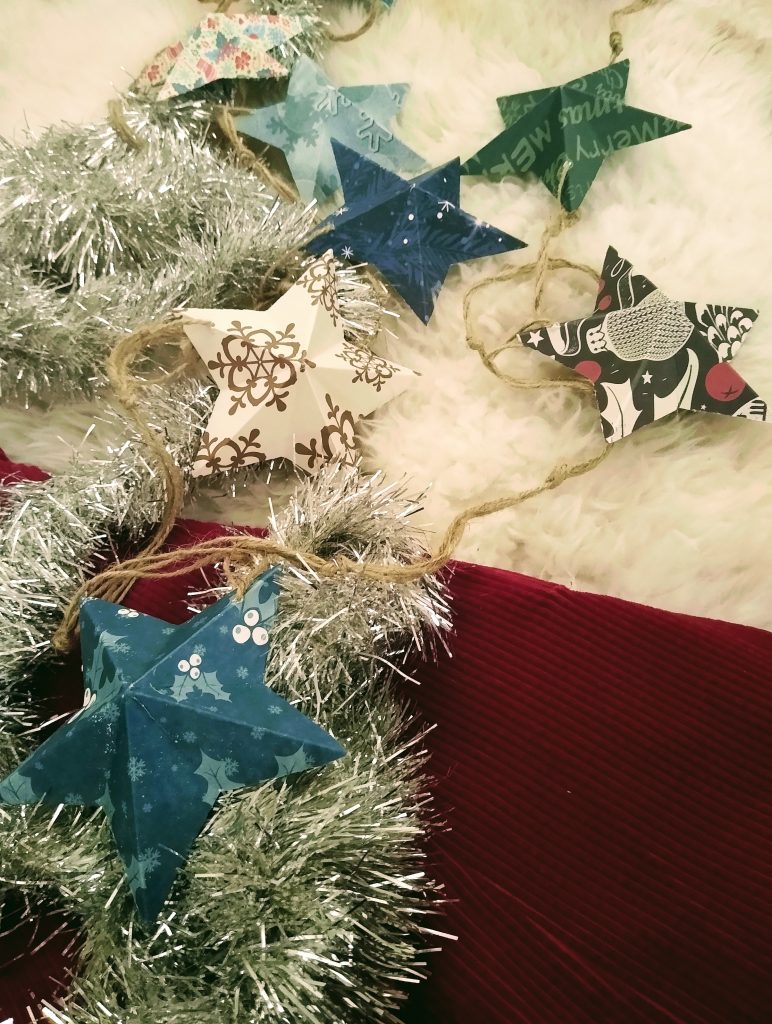
MATERIALS FOR CHRISTMAS STAR GARLANDS
The ideal material to make these star garlands is a thin card around 200gsm. I wouldn’t recommend anything heavier than 250gsm, but you can use paper or a lighter card if you prefer. Just bear in mind a lighter card may be more prone to damage, so handle the finished garlands gently.
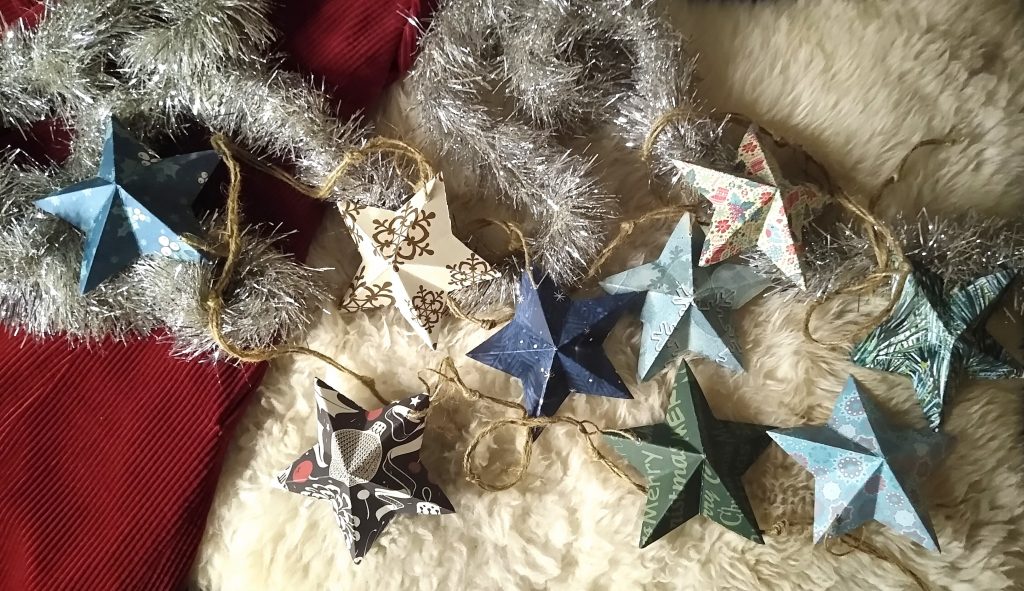
I used these 12″ Design Pads from The Works. They’re cheap, packaging-free, and double-sided, which is important if you’re not always going to hang your garlands against a wall. They’re 250gsm, which makes the cut to create the star shape tricky, but with good strong scissors I managed it!
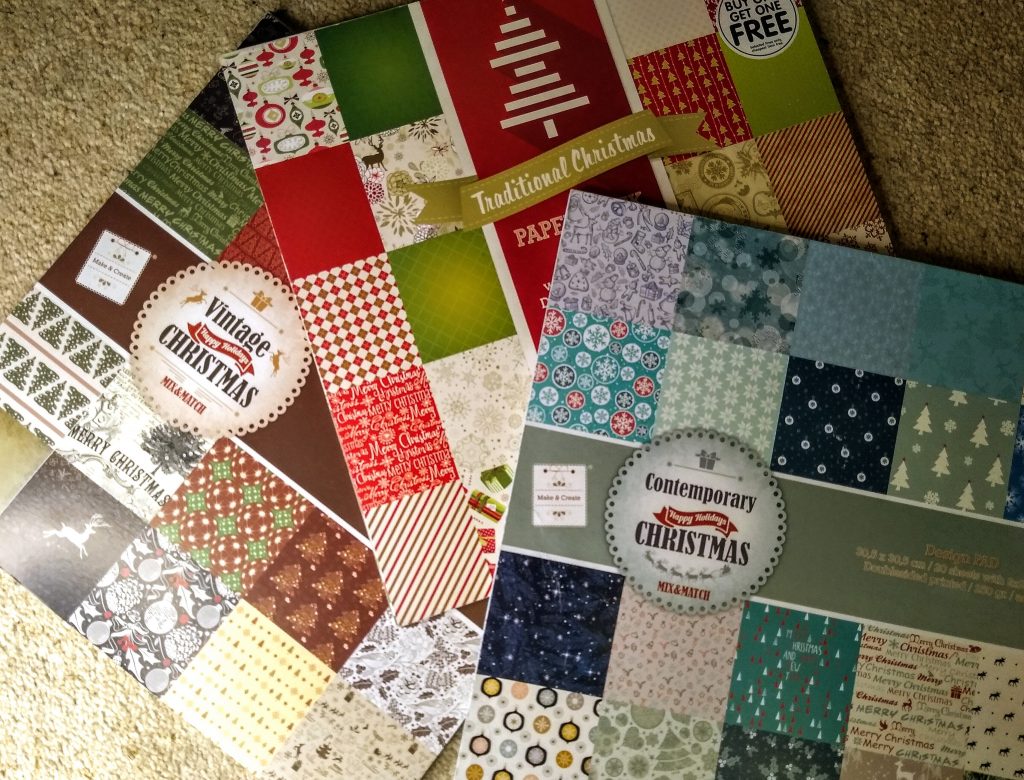
You could also use plain card in any colour of your choice. Or you could pick a plain card and decorate it yourself, though remember that paints and glues can render card unrecyclable, and foiled/metallic card won’t be recyclable either.
You will also need some kind of string to join your stars together. I used brown garden string for a really rustic look, and because it’s compostable at the end of its life. You could use any kind of string, but for the eco-friendliest results make sure to choose natural fibres.
You will also need a sharp, strong pair of scissors, and a craft knife, steel ruler and cutting board (or a paper guillotine/trimmer). You’ll need a sharp point to make holes through the stars and string them – the scissors or craft knife may do. And you might want to use a tape measure to check the lengths of garland you’d like to make.
HOW TO MAKE ECO-FRIENDLY CHRISTMAS STAR GARLANDS
1 – Decide how long you want your garland to be. This is best done by putting up a plain piece of string where you’d like the garland to hang, draping as you’d like it to drape. Alternatively you could use a tape measure to measure between the two points you’d like to hang it from, add 6-12″/15-30cm, and be prepared to adjust the ends for a more precise fit once they’re up. Add a further 18″/45cm to allow for knots and hanging loops, and cut two lengths of string to that size.
2 – Work out how many stars you’ll need by dividing the length by 12″/30cm. (This will give you one star per 12″/30cm. If you’d like your stars to be closer together or further apart, adjust this distance to suit your requirements.) Round down to the nearest whole number.
3 – Holding the two lengths of string together as one, knot them with a simple granny knot every 6″/15cm, starting at the 12″/30cm mark.
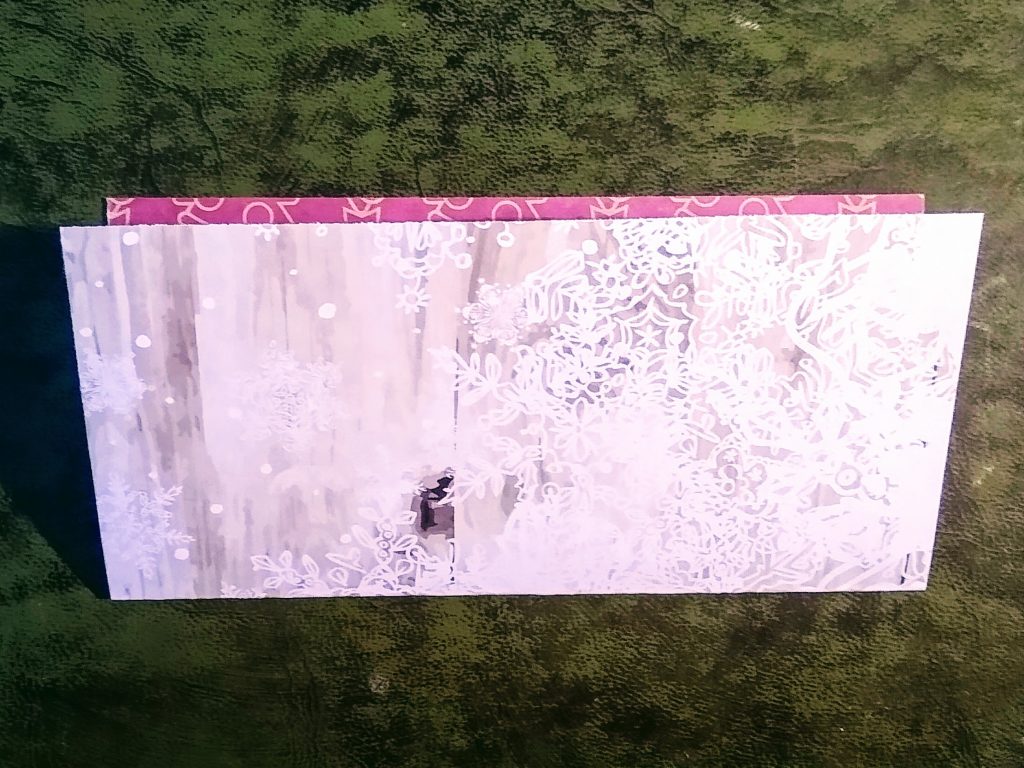
4 – Cut your paper/card into 6″/15cm squares, using a craft knife and steel ruler or a paper trimmer. You’ll need a square for each star.
5 – Make your stars! This method uses Kirigami, which is a mix of paper-folding and cutting. You can watch it done on Youtube here. Otherwise…
- Fold the bottom edge to the top edge.
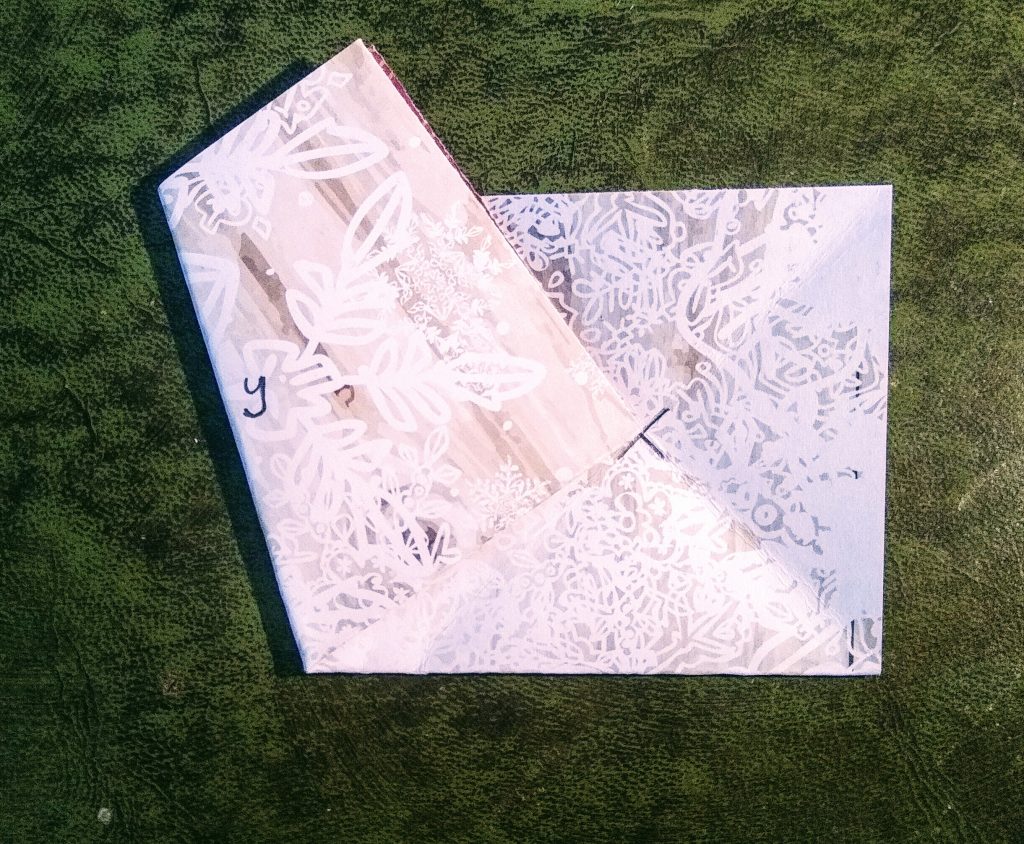
- Find point X by folding the bottom-right corner to the top centre and unfolding it, then folding the top-right corner to the bottom centre and unfolding it.
- Double-check that the folded edge of the rectangle is at the bottom (closest to you). Then fold the bottom-left corner to point X. Don’t unfold it this time. Let’s call the new lefthand edge you just created y.
- Fold that same corner back halfway, so that its edge lines up with edge y. Let’s call the new fold you just made z.
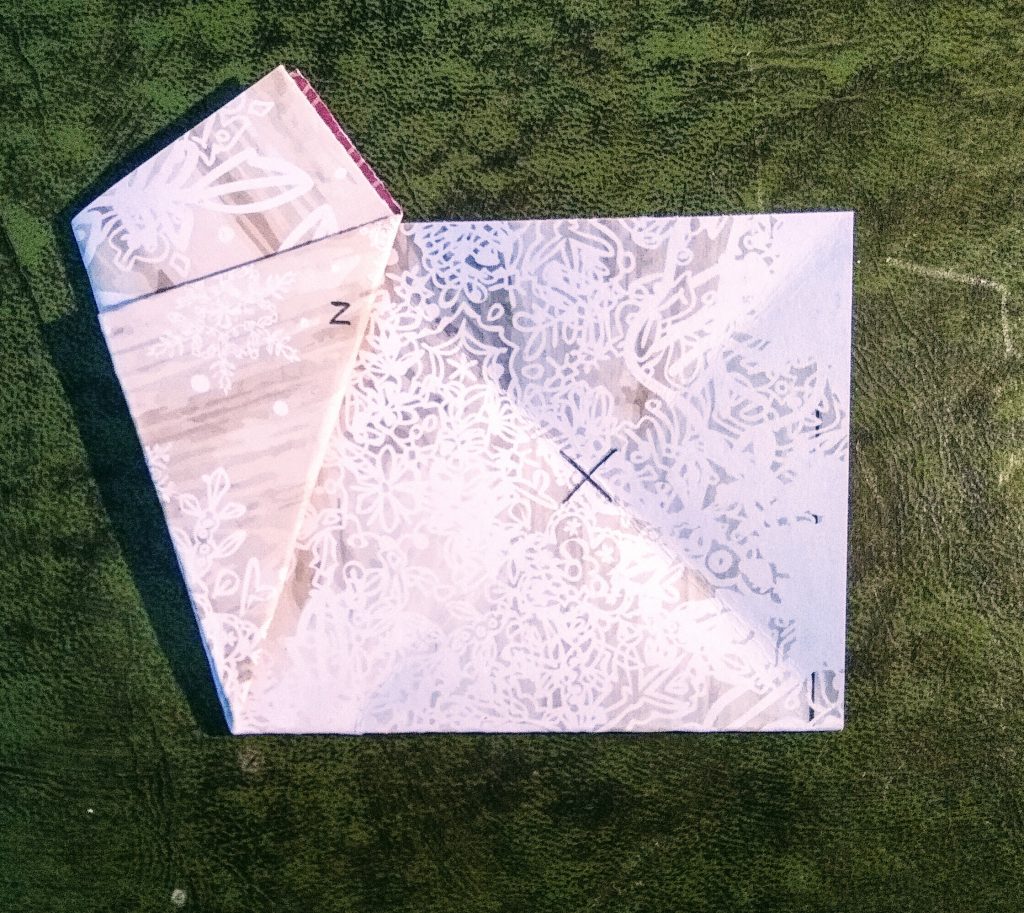
- Fold the right-hand side in towards the middle, so it meets fold z.
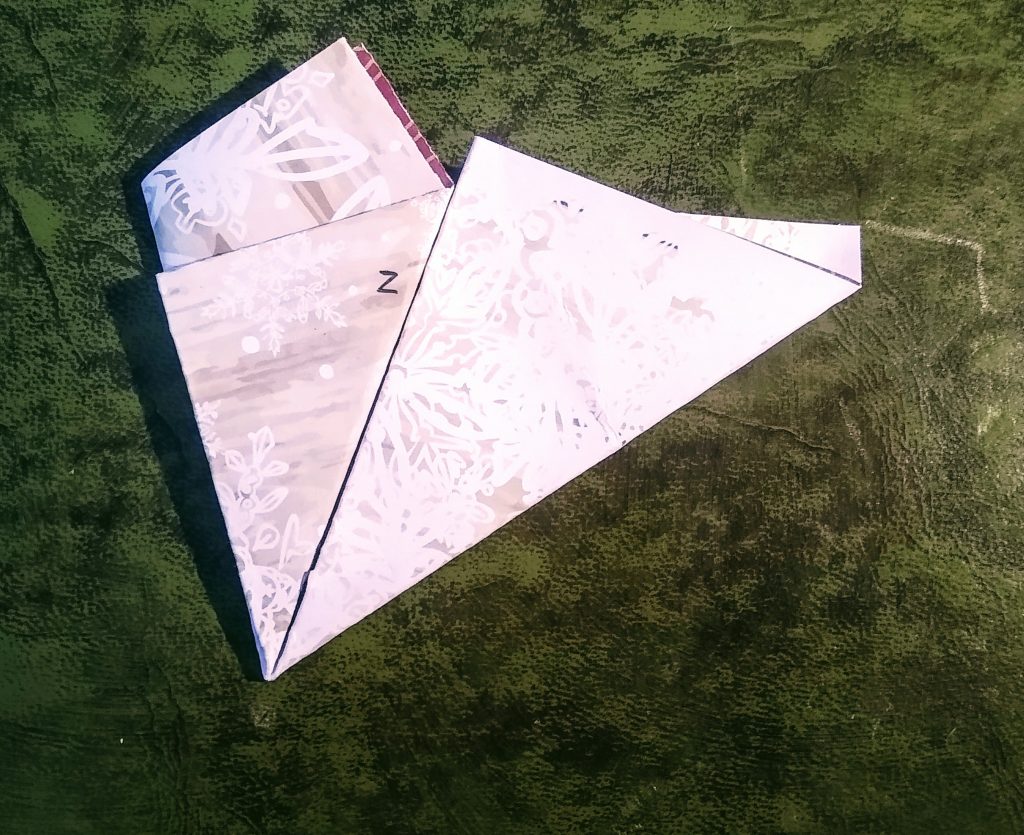
- Flip it over and fold the right side over onto the left, so that the edges line up again, to create a long pointed shape.
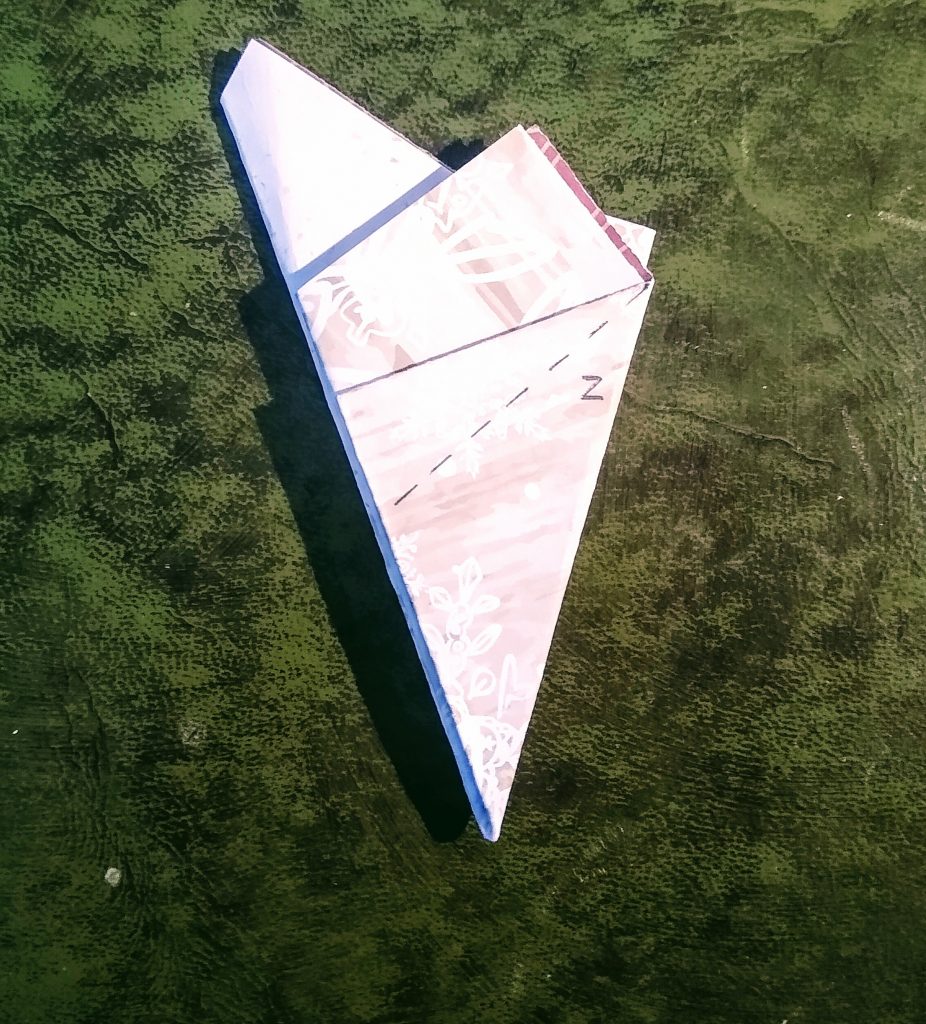
- Cut carefully along the dotted line indicated, and unfold your star! You can play with the exact angle that you cut – just make sure you always start from the very top of fold z.
- Re-crease the folds in alternate directions to create a pleasing 3D star shape.


You might find it helpful to practice with ordinary paper before trying it with card!
6 – Poke a hole in one point of each star, about a finger-width from the tip. Push a 6″/15cm piece of string through each.
7 – Tie the stars onto the main string by looping them through alternate sections between the knots, and tying the ends of the individual strings/threads together. This will make sure they can’t slide around too much and get tangled, while allowing for some minor adjustments while they’re hanging up.
8 – Tie loops in the ends of the garland, and hang up! Adjust length as necessary and then cut off any stray ends of string. To hang our garlands we use Command clips which we leave up permanently. They’re almost invisible when not in use, won’t damage the paintwork, and its really easy to just hang our garlands on the hooks.
You will have noticed that quite a bit of each square goes to waste. Consider reusing it for craft projects such as making Christmas cards or decorative papier mache. Or use a shaped paper punch to turn it into Christmas-themed confetti for the dinner table or to slip into gifts and cards!
MORE USES FOR PAPER STARS
You could also use these easy paper stars as individual hanging decorations, to put on the Christmas tree (or top the Christmas tree!), hang around the house, or give as gifts. Some people like to glue them back-to-back to make a truly double-sided 3D paper star.
STORING YOUR PAPER STAR GARLANDS
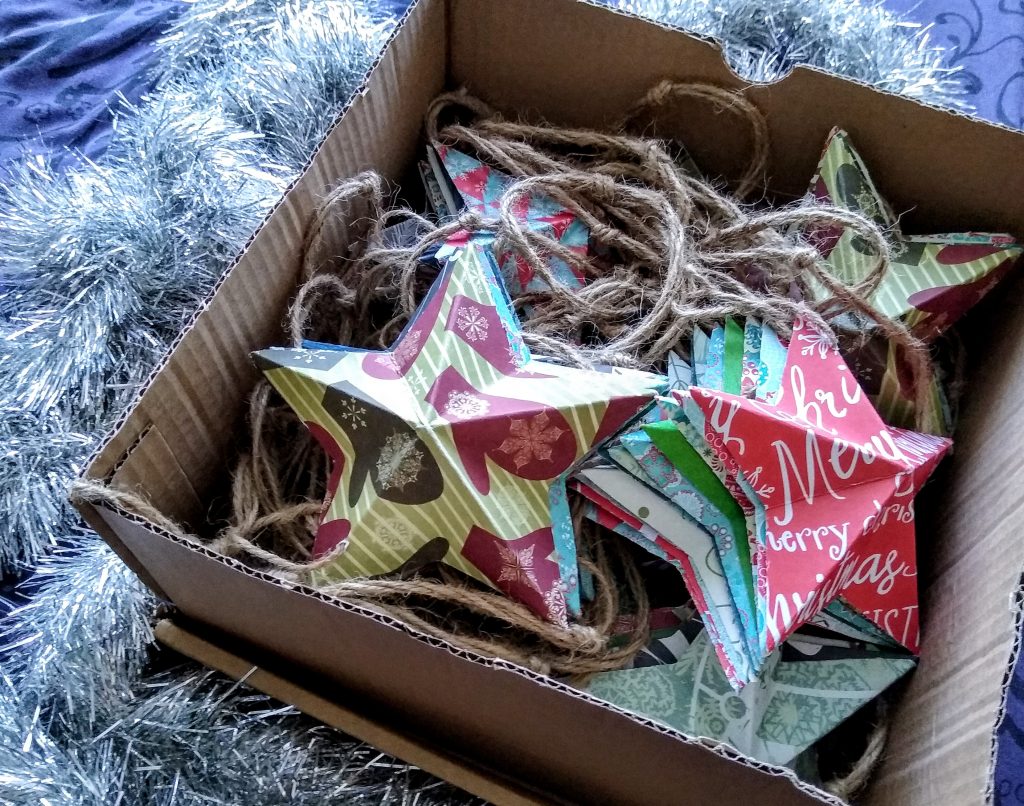
Christmas decorations are notorious for getting tangled up in storage… But I found that if I simply stack the stars of each garland nesting together in order, the string generally takes care of itself and they don’t tend to get tangled.
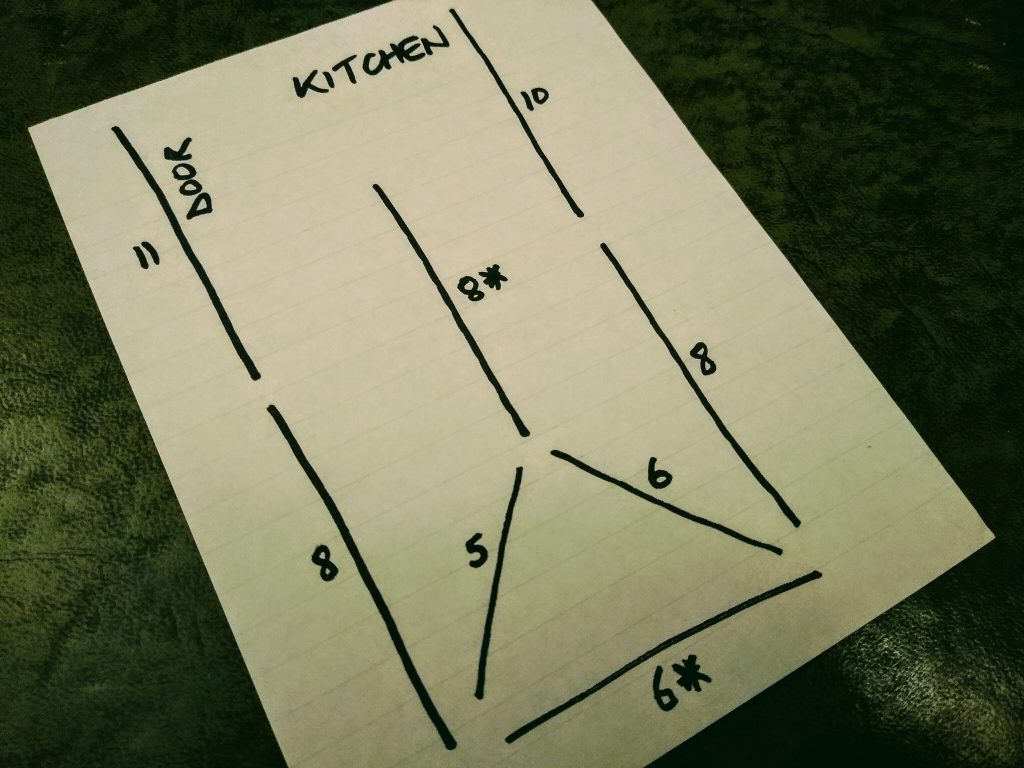
Because we now have several garlands of slightly different lengths to fit different parts of the room, we made this little plan to show which lengths go where. Now we never need struggle to get them back in the right places! The number simply shows the number of stars on the string. An alternative would be to give each one a unique number/name, and write it inconspicuously on the edge of the first star in each garland.
WHAT ABOUT YOU?
How have you lessened the impact of your Christmas decorating? If you make these eco-friendly Christmas garland decorations, please let me know how it went and whether my instructions were up to scratch!
LIKE THIS POST? PLEASE SHARE!